Langley School District staff can access their district email through Office 365 on the web, or through the Outlook program installed on their computer. Just click the link below and sign in with your district email address:
Office 365 Email
Please click on a topic below for additional information
Install Outlook at Home
You can download the full Office suite to your computer at home. To do so first go to Office 365 and log in using your district email. Then click on “Install Office” as pictured below.
Create a new email message

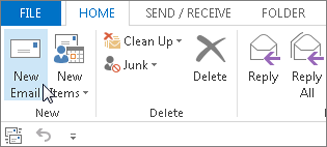
- From any mail folder (such as your Inbox), choose New Email.
- When you’re done composing your email, choose Send.
For more information, see Create an email message.
Add an email signature to messages
In a new message, choose Signature >Signatures.

- On the Email Signature tab, choose New.
- Type a name and then choose OK.
- Under Choose default signature, do the following:
- In the E-mail account list, choose an email account to associate with the signature.
- In the New messages list, choose the signature that you want to be added automatically to all new email messages. If you don’t want to auto sign your email messages, you can ignore this option as (none) is the default value.
- In the Replies/forwards list, choose the signature that you want to be added automatically (auto sign) when you reply to or forward messages. Otherwise, accept the default option of (none).
- Under Edit signature, type the signature, and then choose OK.
Add a signature
- In a new message, choose Signature, and then choose the signature that you want.

For more information, see Create and add an email message signature.
Open or save an email message attachment
You can open an attachment from the reading pane or from an open message. After opening and viewing an attachment, you can save it. If a message has more than one attachment, you can save them as a group or one at a time.
Open an attachment
Depending on the version of Outlook you’re using, there might be multiple options available to open an attachment.
- Double-click the attachment.
For more information, see Open attachments.
Save an attachment
- Choose the attachment in the reading pane or the open message.
- On the Attachments tab, in the Actions group, choose Save As. You can also right-click the attachment, and then choose Save As.

For more information, see Save attachments.
Create a calendar meeting or appointment
In Outlook, appointments aren’t the same as meetings. Appointments are activities that you schedule in your calendar that don’t involve inviting other people or reserving resources, such as a conference room or equipment.

- In a Calendar folder, choose New Appointment. You can also right-click a time block in your calendar grid, and then choose New Appointment.
 Keyboard shortcut: To create an appointment, press Ctrl+Shift+A.
For more information, see Schedule an appointment.
Schedule a meeting
In Outlook, a meeting includes other people and can include resources such as conference rooms. You’ll get responses to your meeting requests in your Inbox.
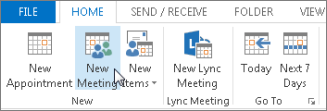
- In a Calendar folder, choose New Meeting.

Keyboard shortcut: To create a new meeting request from any folder in Outlook, press Ctrl+Shift+Q.
For more information, see Schedule a meeting with other people.
- In a Calendar folder, choose New Appointment. You can also right-click a time block in your calendar grid, and then choose New Appointment.
How to access Public Folders in MAC Outlook Client (2016)
Before you can access public folders from your Outlook client on MAC, you need to subscribe to them first. Please follow the instructions below to subscribe to public folders within Outlook.
From your Outlook client, click Tools, then Public Folders.
Folder browser window opens, by expanding on SD35 and other public folders listed on the screen, navigate to the specific public folder you would like to add, then click Subscribe (the green + sign, upper left)
In this example, I am adding Counselling public folder which is under Forms and Procedures, under District Resources, under SD35 (screen shot 2).
Once the folder is subscribed, the folder name will turn bold and it will appear under Subscribed Public Folderswithin the left pane of your Outlook.
Close folder browser window, click on Subscribed Public Folders, the icon is below towards the bottom of your inbox folders. Click on the public folder you have added; its contents will appear on the right pane. (Screen shot 3)
Important Notes:
• Folders and calendars need to be subscribed individually
• If you subscribe to a public folder and it contains additional sub folders, you will need to subscribe the sub folders, not the root folder.
• If you subscribe to a public folder and it contains files, you don’t need to subscribe to the files. They will appear under the folder.
• ensure that you have installed the most recent updates for your Microsoft Office Products (word, excel, outlook). You may run into various errors without the latest updates.
How to add Public Folders Calendars in MAC Outlook Client (2016)
In this example, I am subscribing to a public folder calendar called ACS BBQ Popcorn Machine since it sounded interesting!
By following the same steps as How to access Public Folders in MAC Outlook Client (2016), subscribe to the specific calendar. Once done, this shared calendar will appear under your own calendar.
To view, click on your calendar folder within Outlook, scroll down, expand Subscribed Public Folders, click on the calendar you have added to view the appointments.


Important Notes:
• Folders and calendars need to be subscribed individually
• If you subscribe to a public folder and it contains additional sub folders, you will need to subscribe the sub folders, not the root folder.
• If you subscribe to a public folder and it contains files, you don’t need to subscribe to the files. They will appear under the folder.
• Please also ensure that you have installed the most recent updates for your Microsoft Office Products (word, excel, outlook). You may run into various errors without the latest updates.
How to access Public Folders from Office 365 Email (Online Version)
When using web version of Outlook 365 (previously known as OWA), public folders are not immediately available by default. You will need to add the public folders in to your Favorites (a set of folders within your mailbox) before you can view them from your Office 365 mailbox.
From Outlook, right click on Favorites, then “Add public folder to Favorites” (if you do not see Favorites, click on More, screen shot #1, below)
Navigate to the specific folder you would like to access, then click Add to Favorites. In this example below, I am adding Admin Resources public folder to my Favorites.
If Favorites is not visible, click More.

Right click on Favorites, click Add Public Folder to Favorites

Navigating to Admin Resources Public Folder, adding to Favorites by clicking Add to Favorites

Admin Resources Public Folder has been added:

If you are using Outlook client on your MAC (not the web version), the previous procedure on how to access Public Folders has not changed.
Please note the following:
• If you need to access multiple public folders, they have to be added to your Favorites individually
• Adding a public folder to Favorites does not show the sub folders
• If you need access to Public Folder Calendars, Shared Contacts, Parents Email Lists, it is recommended that you use Outlook client (the one that is installed on your desktop) since the online version lacks some of those functionalities.
• If you do not have Outlook client installed, please touch base with your school’s IT Support Specialist.
How to Add Public Folder Calendars using Outlook Online
Click on Calendar icon (From Outlook Online)
Right click on Other calendars, click Add public folders to Favorites.
Navigate to the desired calendar by clicking on the triangles and expanding the public folder tree.
Click on the calendar, then click Add to Favorites, click close (X)
Public Folder calendar has been added.
Click on down arrow next to Other calendars, the newly added public folder calendar should appear.
In this example below, I am adding Room 211 public folder calendar from Outlook Online:
Clicking on Calendar icon from Outlook Online:
Right clicking on Other calendars.
Then Add public folder to Favorites.

Navigating to the appropriate calendar (Room 211, in this example)
Click Add to Favorites
Click X to close when added.

Expanding calendar by clicking on the down arrow (if it is not expanded already)
Room 211 public folder calendar is displayed.

How to Setup Outlook client on a MacBook
Click on Outlook icon
Click Tools, then “Accounts….”
In the Accounts dialogue box, click on Exchange or Office 365.
Enter the required info:
E-Mail address: Your district email address
User name: Your district email address
Password: Your login password
Ensure that the “Configure automatically” box is checked.
In the “Outlook was redirected…”. prompt, click “Always use my response” box, and click Allow Enter your login password on the Office 365 authentication page, click Sign in.
By default, Outlook on MAC uses Sd35 as the account name.
Replace Sd35 with your Full Name, hit Enter.
Close Outlook, reopen. Your email messages should start to download.
I have added a few screen shots below for these steps:


How to Access Archived Calendar


 Keyboard shortcut: To create an appointment, press Ctrl+Shift+A.


Recent Comments